Master TPO Roofing Leak Solutions
A single puncture in a TPO roofing membrane can lead to severe water damage, mold growth, and thousands in repair costs if left unchecked. This guide equips homeowners and property managers with proven methods to identify, pinpoint, and repair leaks in TPO roofing systems before small problems escalate. You will learn what makes TPO roofs unique, how to conduct a safe inspection, advanced leak-detection techniques, essential repair tools, step-by-step patching methods, when to enlist professional help, and strategies to prevent future water intrusion. By the end, you’ll have actionable expertise—and know how Gomez Roofing delivers dependable TPO solutions—to protect your property from costly leaks.
What Is TPO Roofing and Why Do Leaks Occur?
What Is a TPO Roof and Its Key Features?
Thermoplastic polyolefin (TPO) roofing is a single-ply membrane made of polypropylene and ethylene-propylene rubber. Its reflectivity and heat-welded seams make it energy-efficient and durable for flat or low-slope commercial applications. TPO roofing has high chemical resistance, UV stability, and an expected lifespan of 20–30 years, which positions it as a top choice for large facilities. Understanding these properties lays the foundation for recognizing how and why breaches can develop.
TPO Roofing: Properties and Applications
TPO roofing is a single-ply membrane composed of polypropylene and ethylene-propylene rubber, known for its energy efficiency and durability in commercial applications. Its heat-welded seams and resistance to chemicals and UV exposure contribute to its longevity.
This supports the article’s introduction of TPO roofing and its key features, including its composition and benefits.
What Are the Most Common Causes of TPO Roof Leaks?
The primary causes of TPO roof leaks stem from material stresses and installation issues. Before diving into repair methods, consider the following factors that most often lead to membrane failures:
- Improper seam welding that allows water seepage under membrane overlaps
- Punctures from foot traffic, debris impact, or equipment installations
- Flashing failures around penetrations, skylights, or parapet walls
- Installation errors such as wrinkles, voids, or under-insulation gaps
- Material degradation due to chemical exposure, ponding water, or UV aging
Each cause triggers water intrusion that can compromise roofing integrity and lead us to targeted inspection techniques in the next section.
Common Causes of TPO Roof Leaks
Improper seam welding, punctures from foot traffic or debris, flashing failures, installation errors, and material degradation are the primary causes of TPO roof leaks. These factors can compromise the membrane’s integrity.
This aligns with the article’s discussion of the main causes of TPO roof leaks, highlighting the importance of understanding these factors for effective repair.
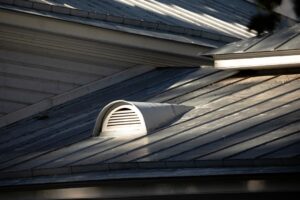
Where Do TPO Roof Leaks Typically Occur?
Leaks in TPO membranes most often appear at vulnerable junctions where the roof’s continuity is interrupted. The table below highlights common leak locations along with their inherent vulnerabilities and typical leak mechanisms.
| Location | Vulnerability | Leak Mechanism |
|---|---|---|
| Seams | Welded overlap points | Incomplete heat-weld or tape failure |
| Penetrations | Roof-to-equipment junction | Sealant shrinkage or improper flashing |
| Flashing | Transition to walls/skylights | Peel-back, cracks under thermal stress |
| Drains & scuppers | Water-collection outlets | Debris clogging causing ponding and membrane fatigue |
| Pipe Boots & vents | Rubber collars | Cracks in boot material or loose clamp |
These hotspots require focused inspection strategies and specialized repair methods to restore watertight performance.
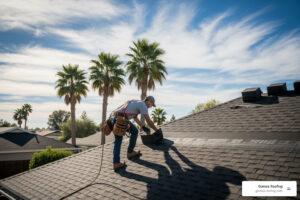
How Do You Safely Inspect a TPO Roof for Leaks?
What Safety Precautions Should You Take During Roof Inspections?
Before stepping onto a TPO roof, ensure personal safety and roof integrity. Always:
- Wear non-slip footwear and a safety harness anchored to a certified point.
- Use a sturdy extension ladder secured with stabilizers.
- Inspect weather conditions—avoid inspections during rain, high winds, or extreme heat.
- Keep the membrane free of oil, grease, or sharp objects that could cause slips or further damage.
Observing these precautions safeguards you and preserves the roof surface before any visual assessment.

This emphasis on safety leads directly into the visual inspection techniques that follow.
How to Perform a Visual Inspection for TPO Roof Damage?
Begin every roof survey with a systematic visual sweep. Look for blisters, punctures, loosened seams, water stains, and debris accumulations. Walk the roof in a grid pattern, marking damage with chalk or flagging tape. If you spot membrane wrinkles or delamination, document those areas for further testing. This close-range assessment reveals surface-level defects and guides targeted water testing in the next step.
How Is Water Testing Used to Detect TPO Roof Leaks?
Water testing isolates leaks by simulating rainfall over specific roof sections. Follow these steps for controlled water testing:
- Seal off a 10×10-foot area around the suspected leak.
- Gently spray with a garden hose, starting at the low point and moving uphill for 10–15 minutes.
- Have a partner inside to watch for drips or stains emerging from the ceiling.
- Mark the exact drip location; repeat the process on adjacent zones until you pinpoint the entry point.
Water testing confirms visible damage and often uncovers hidden leaks that require infrared thermography, which we will explore next.
What Are Advanced Leak Detection Methods Like Infrared Thermography?
Infrared thermography uses a thermal camera to detect subsurface moisture by capturing temperature differentials. Cold spots on thermal images indicate water retention under the membrane. This non-destructive method rapidly scans large areas, identifies masked leaks, and validates repairs without cutting into roof layers. Combining visual, water, and infrared testing ensures no leak goes undetected before moving to repair preparations.
Infrared Thermography for Leak Detection
Infrared thermography uses thermal imaging to detect subsurface moisture by identifying temperature differences. This non-destructive method helps locate hidden leaks and validate repairs without damaging the roof.
This supports the article’s explanation of advanced leak detection methods, specifically infrared thermography, as a crucial tool for identifying leaks.
How Can You Identify the Exact Source of a TPO Roof Leak?
How Does Water Travel Affect Leak Source Identification?
Water can travel several feet from its entry point before dripping inside, obscuring the original breach location. Understanding water migration paths—guided by slope, insulation channels, and deck seams—helps trace the true leak origin rather than chasing ceiling stains. Mapping water flow across the deck leads directly to the damaged membrane section requiring repair.
What Interior Signs Indicate a TPO Roof Leak?
Interior clues often reveal hidden leaks before you climb on the roof. Common indicators include:
- Water stains or peeling paint on ceilings and walls
- Damp or discolored insulation above ceiling tiles
- Mold growth or musty odors in attic spaces
- Dripping sounds during rain events
These signs guide your rooftop investigation by confirming active leaks and narrowing down inspection zones.
What Tools and Materials Are Needed to Repair TPO Roof Leaks?
Which Tools Are Essential for TPO Roof Leak Repair?
Effective TPO repairs rely on specialized instruments. The following list outlines the core tools and materials:
- Heat gun for melting membrane and activating adhesive
- Seam roller to press and bond patch material
- TPO-compatible cleaning solution for surface preparation
- Primer and seam tape for reinforcing welds
- TPO patch material cut to size for puncture repairs
- Utility knife for trimming patch edges
Ensuring you have these items on-hand streamlines the repair process and promotes durable results.
This toolkit preparation leads into the cleaning and drying steps that follow.
How Should You Prepare the Repair Area?
A successful repair begins with a pristine surface. First, remove all debris and dust, then apply a TPO-safe cleaning solution to dissolve oils and residue. Rinse thoroughly and allow the membrane to dry completely—moisture impedes adhesion and compromises patch integrity. Once the area is clean and dry, you’re ready to apply patches or re-weld seams.
What Are the Step-by-Step Methods to Fix Common TPO Roof Leaks?
How Do You Repair Small Punctures and Tears in TPO Roofing?
Repairing minor membrane damage involves three stages: cleaning, patching, and welding.
- Clean the area with solvent; let it dry.
- Position a TPO patch overlapping the damaged zone by at least 3 inches.
- Use a heat gun to melt the patch’s underside and the surrounding membrane.
- Apply firm pressure with a seam roller to fuse edges into a continuous membrane.
This heat-welded patch becomes part of the original roof layer, restoring waterproof performance without bulk.
How Can Loose or Failed TPO Seams Be Fixed?
Re-welding or taping failed seams reestablishes seam integrity. First clean the seam overlap and apply primer. For heat welding: run a heat gun along the seam overlap while guiding the roller behind the weld area. For seam tape: center the tape over the cleaned joint, heat the tape until adhesive activates, then roll firmly. Each method creates a monolithic seal that prevents future water penetration along lap joints.
How Do You Repair Flashing and Penetration Leaks on TPO Roofs?
Flashing around vents, skylights, and parapets often cracks or lifts under movement. To restore flashing:
- Remove old sealant and loose flashing material.
- Clean and dry the underlying roofing deck and membrane.
- Apply TPO-compatible flashing membrane or preformed boot around the penetration.
- Heat-weld edges and press with a roller to lock seams.
- Seal transitions with a low-profile, UV-stable silicone sealant for added protection.
This combination of welding and sealing reinstates a watertight barrier around roof penetrations.
What Are Emergency Repair Options for TPO Roof Leaks?
When immediate protection is critical, temporary measures can buy time until permanent repair. Common emergency fixes include:
- Applying waterproof roof tarps to cover large breach areas
- Using cold-applied emergency sealants or mastics to fill punctures
- Securing coated fabric patches with mechanical fasteners and sealant
While not durable long-term, these interim solutions prevent interior damage until a full TPO repair can be performed.
When Should You Call a Professional for TPO Roof Leak Repair?
What Leak Scenarios Require Expert TPO Roofing Contractors?
Extensive damage, multiple leak sources, and structural concerns are clear signals to enlist professionals. Gomez Roofing’s certified technicians handle complex seam failures, large-scale membrane replacements, and intricate flashing rebuilds with specialized equipment and factory-trained methods. Their Commercial TPO Roofing Services integrate precision welding and industry-approved materials to deliver lasting results.
Choosing expert intervention ensures that repairs conform to manufacturer specifications and preserve roof warranties.
What Are the Benefits of Professional TPO Roof Repair Services?
Professional TPO repair offers:
- Expertise in advanced welding techniques that guarantee seam integrity
- Specialized tools—infrared cameras, industrial heat welders—for accurate detection and repair
- Warranty protection from certified manufacturers, extending roof lifespan
- Comprehensive documentation of repair work for insurance claims and maintenance records
Relying on experienced contractors minimizes risk and secures dependable performance for your TPO roofing investment.
Secure professional support to maintain your roof’s long-term watertight integrity and move on to preventive strategies.
How Can You Prevent Future Leaks in Your TPO Roof?
What Are Best Practices for Regular TPO Roof Maintenance?
Routine maintenance preserves membrane performance and prevents small defects from expanding. Key practices include:
- Schedule biannual inspections to catch seam fatigue and membrane wear early.
- Remove debris, sediment, and standing water to avoid punctures and material stress.
- Check and clear drains, scuppers, and gutters to ensure efficient water flow.
- Re-seal flashing and penetration collars as needed to counter sealant breakdown.
Consistent attention to these tasks extends TPO membrane life and reduces unplanned repair costs.
Why Are Professional Roof Inspections Important for Leak Prevention?
Annual inspections by certified contractors detect emerging issues that visual surveys may miss. Infrared thermography identifies hidden moisture, seam testing reveals weld weaknesses, and manufacturer-approved technicians can perform warranty-preserving maintenance. Investing in professional evaluations keeps your roof in top condition, mitigating leak risks and sustaining energy-efficiency benefits.
Regular maintenance and expert inspections form a proactive defense, helping you avoid the expense and disruption of emergency repairs.
Proactive care closes the loop on leak management and positions you to enjoy the full advantages of a durable TPO roofing system.
A proactive approach to TPO roofing maintenance and repair prevents costly water damage, extends membrane longevity, and protects property value. Whether you tackle small punctures yourself or engage Gomez Roofing’s Commercial TPO Roofing Services for large-scale repairs, these methods ensure a watertight, energy-efficient roof. Implement inspection routines, apply proper repair techniques, and schedule professional evaluations to keep leaks from undermining your building’s integrity. For dependable roofing and solar solutions, trust Gomez Roofing to safeguard your investment with expert workmanship and exceptional service.